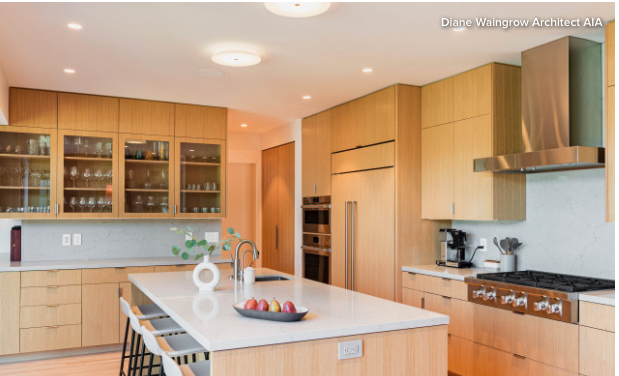
When you’re planning a new kitchen, the layout is, of course, key to making the space work efficiently. But there are other things to think about. Take a look at this checklist to ensure that you tick off seven essential elements of a well-designed space.
1. Sufficient Storage
If you want your kitchen to be functional, one of the most important features to consider is storage space.
Think carefully about what you need to store, and choose cabinets that work with the size and layout of your kitchen. Research space-saving designs, such as pullouts and tall wall cabinets.
It’s a good idea to take an inventory to figure out exactly what you need to store. Be realistic, and if there are any unused items that are cluttering up the space, now’s the time to recycle them. Once you know what items you’re storing and where you’re going to use them, you can consider the best options for your space.
2. Strong and Stylish Counters
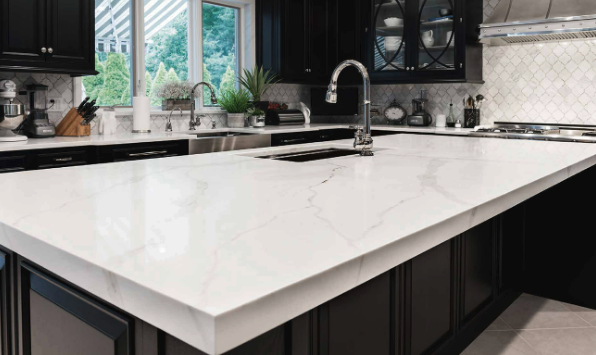
If you like to cook, your kitchen work surfaces will see some action, so besides good looks, they need strength and durability. To help you decide which type of countertop to go for, consider exactly how you use your kitchen.
Think about how much wear and tear particular areas in your space will get, as this will determine how durable your counters need to be.
3. Efficient Appliances
The appliances you choose also will depend on how you use your kitchen and the size and layout of the room. For example, if you entertain often, a large oven and a dishwasher may be a priority.
When you’re searching for appliances, consider how energy-efficient they are. One thing you can do is look for products with an Energy Star label, a U.S. government-backed symbol of energy efficiency.
4. Layered Lighting
As soon as you’ve planned your kitchen’s layout, think about where you’ll locate the lighting. Complement functional spotlights with strategically placed task lights to create a lighting design that adds depth and practicality to your space.
6. Durable Flooring
In a heavy traffic area like a kitchen, the floor needs to earn its keep. There are many surfaces you can go for, including natural stone, concrete, ceramic and porcelain. You also can choose beautiful wood, but be sure to get advice on how to seal it and protect it from water damage.
Think about how your floor will look with the rest of your design and whether you’ll want to change it in the future. Classic stone tiles will work with most styles and colors. However, a patterned floor also can look stunning and, if you really love the design, it could be worth being brave with your flooring choice.
written by Amanda Pollard
Kitchen trends are always changing. While some homeowners may opt to stick to a certain style throughout their lifetime, it can be fun to spice things up and give the kitchen a new look.
For homeowners who want to upgrade their kitchens, one of the most common questions that they ask is: what countertops are in style? Today, we will explore countertops that are in style in 2022 and help homeowners spruce up their kitchens to create a fresh, contemporary space in their home.
Kitchen islands are a vital aspect of the kitchen design. Move over short kitchen islands; enter longer kitchen islands. Homeowners are now opting for longer kitchen islands in 2022, given the ability to cook, entertain and work.
The creation of extra storage space also contributes to this trend. Most homeowners have even added closed-door cabinets below their island countertops that are perfect for storing their cooking equipment and kitchen tools.
First-time homeowners always wonder what kitchen countertops are in style, especially when trying to achieve a balance between countertop trends, personal preference and functionality.
Gone are the days when dark-toned countertops were barely used. Now, homeowners are starting to incorporate dark countertop colors into their kitchen designs, and even pairing these counter surfaces with other dark and bold elements in their spaces.
For instance, the black-countertop-black-cabinet trend is a great combination that adds depth and character into any kitchen space. While some may be skeptical about this pairing, this black-on-black theme is never boring. Luckily, there are a wide variety of black hues from which to choose from, including veined, speckled, solid, and industrial countertops. One popular option is 5101 Empira Black, a deep, dark stone with subtle white veins that dance across the surface of the quartz slab.
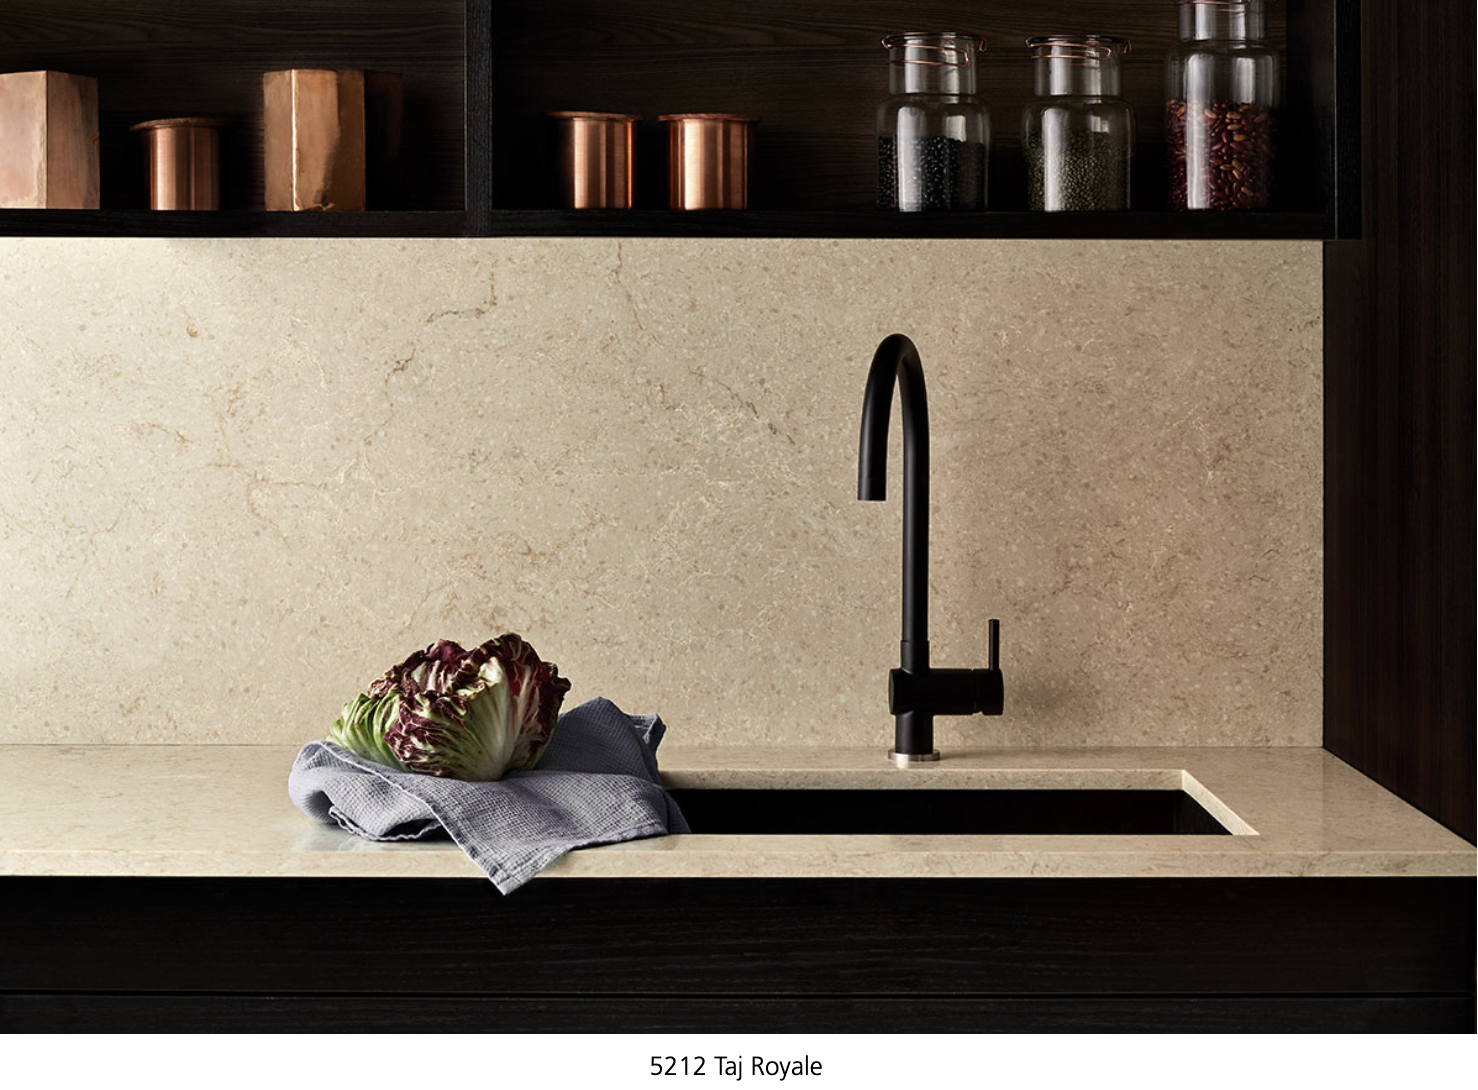
The majority of today’s kitchens are now featuring countertops that extend into the backsplash, creating a unique and opulent look. This trend makes a statement in any space in the home. Picture a kitchen with a matching countertop and backsplash of beautiful quartz colors, like 5161 Icellion or 5212 Taj Royale.
In 2022, homeowners are becoming more creative in their kitchen spaces by matching countertops with their cabinets. For instance, an all-white kitchen with a countertop like 5141 Frosty Carrina exudes a classy and modern vibe and can pair well with a wide spectrum of cabinets, whether hues of bold, bright or neutral colors.
To create a layered intrigue, homeowners can mix their countertop patterns. For instance, a homeowner who is looking to upgrade their kitchen can add some veined countertops as a kitchen island, with the rest of the adjacent countertops being a crisp white such as 2141 Blizzard. This color combination produces a subtle contrast that can pair well with most kitchen styles.
Honed countertop finishes are quickly growing in popularity in 2022. This, however, does not mean that a natural or polished finish is no longer stylish, only that these other finishes are growing in popularity as well.
Depending on personal style and the desired aesthetic in their homes, homeowners can try out Caesarstone’s range of honed quartz countertops such as 4030 Pebble. A honed finish not only adds to the sophistication in the space but also creates a modern appeal.
Homeowners who want to experiment more with colors, styles and patterns can try Caesarstone’s new, sustainably crafted Pebbles Collection. Inspired by nature, these new countertop colors can bring a calm feel to any kitchen space.
The wide variety of quartz patterns available also makes it easy for homeowners to pair their countertops with other kitchen elements such as their cabinetry, walls, backsplashes and flooring.
Outdoor kitchens are the perfect medium to cook, entertain, work or even enjoy some solo time. However, for best results, only outdoor countertops should be used to build an outdoor kitchen, such as Caesarstone’s Outdoor Collection of quartz countertops.
Homeowners can choose from striking colors like 515 Palm Shade and 406 Clearskies.
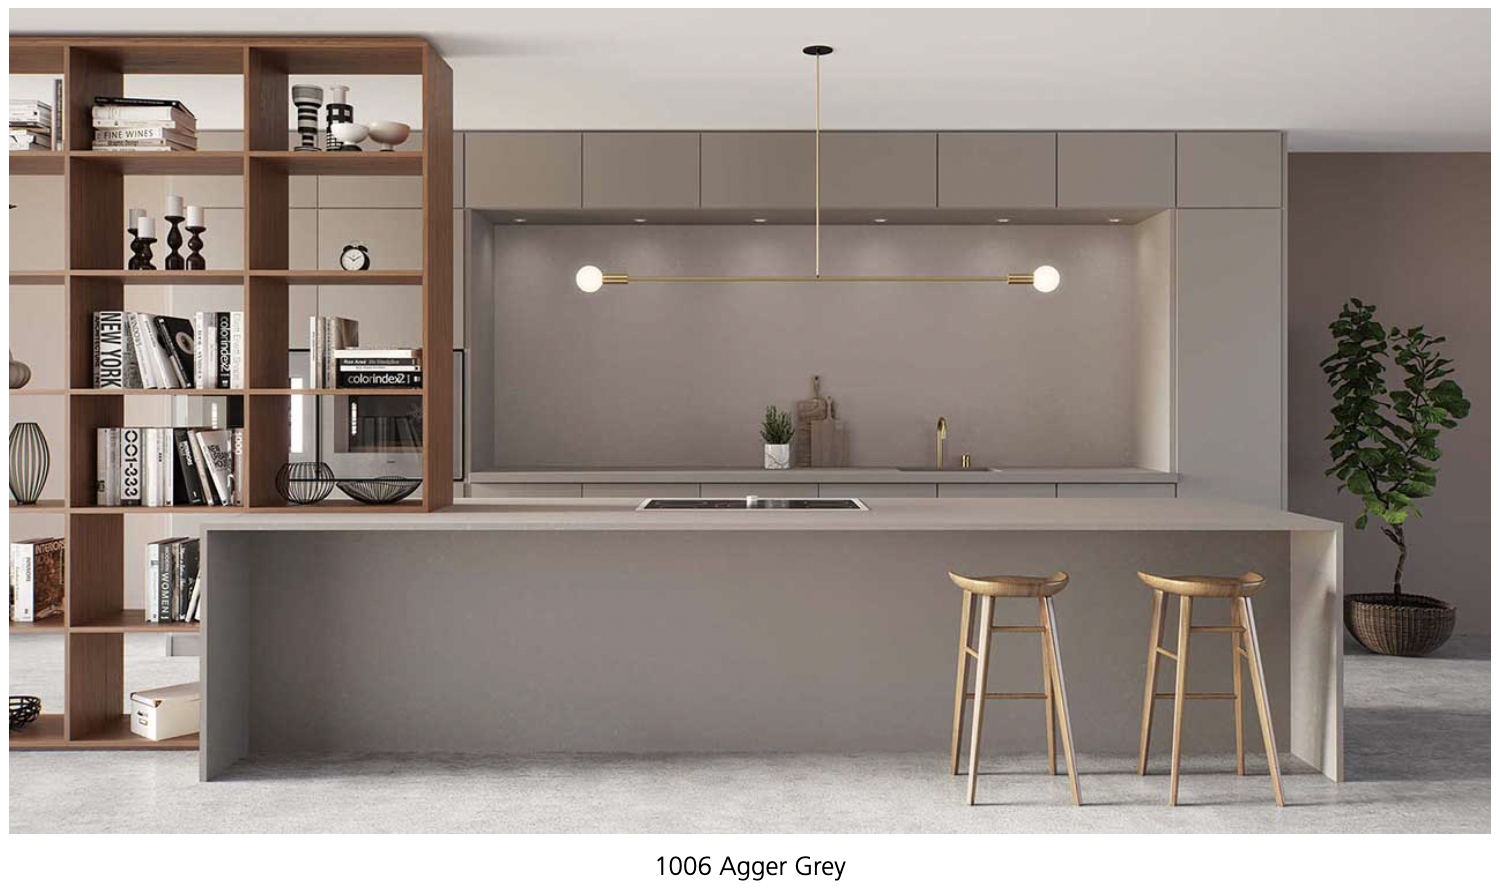
The versatility of bold neutral colors, such as 1006 Agger Grey, pairs well in most kitchen spaces, more so for homeowners who want to add a pop of color to their kitchen. This playful color draws the eye and makes the countertop the centerpiece of the space.
For homeowners wondering what type of countertops are in style for minimalist kitchens, gray quartz is a great option. Its laid-back tone means that it can go well with a wide spectrum of décor pieces while also serving as a balance between other contrasting features in the space. Homeowners who want to incorporate gray countertops into their 2022 kitchen design can opt for colors like Caesarstone’s new 1004 Stoneburst.
Whether you are moving into an existing kitchen, remodeling the one you have or building a new one, understanding a few key building measurements and organizational guidelines can help your culinary life run more smoothly.
Kitchens provide storage for your food and cookware, give you room for prep and cleanup, and of course also provide a place where you can cook and bake. When it’s thoughtfully arranged, these functions operate logically, making working in your kitchen a better experience. Here’s how to get the ideal setup.
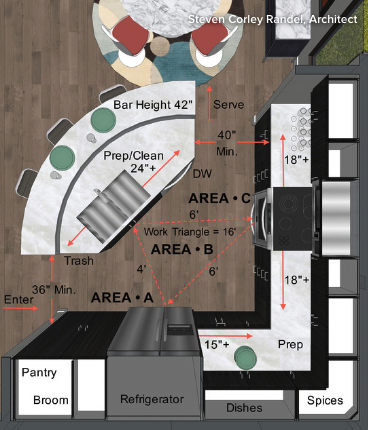
Designing the Three Main Areas of a Kitchen
Ideally, refrigeration and dry-goods storage should be located nearest to the kitchen’s entry point. The cooking area should be located toward the dining spaces, and the sink is best positioned between those two functions. This creates what’s called a work triangle. The best work triangle is less than 21 linear feet (6.4 meters). Work triangles that exceed 26 feet (7.9 meters) make moving from one function to another inefficient in most cases.
Everyone has personal preferences for what works best, so consider this a guide and not a rulebook.
1. Storage. Designers recommend putting refrigeration and dry-goods storage at the kitchen entry point. Putting your pantry on one side and a countertop that’s 15 to 24 inches (38 to 61 centimeters) on the other is a good idea. This will allow you to easily set down items that have been taken out of the freezer and refrigerator.
The pantry can hold dry goods plus brooms and supplies like paper towels. Use drawers in this area to hold plastic bags, foil and anything that can contain food to be stored. For the cabinets in this area, you will want to have mixing bowls, cake pans, measuring utensils and any other items that aid in assembling meals.
2. Preparation. Ideally, prep and cleaning space is best located around the sink.Within these areas will be everyday glasses and dishes, along with trash receptacles and the dishwasher. Allow 18 to 36 inches (45 to 92 centimeters) of countertop space on one or both sides of your sink.
Preparation areas are best kept clear of other items, since you will always be taking out bowls, plates and utensils there. Allow at least 36 inches (92 centimeters) of uncluttered countertop space for preparation in a small kitchen. Larger kitchens will have much more. This is one reason that islands are so popular. They provide broad and well-lit surfaces on which to perform the majority of kitchen tasks.
3. Cooking. The cooking centers should be arranged around the range, cooktop and wall ovens. Place pots, frying pans and baking sheets in the vicinity around your burners and ovens. It is a good idea to place small appliances such as toasters and coffeemakers in this area also, as it will leave your preparation areas unobstructed.
Allow 21 to 36 inches (53 to 92 centimeters) of countertop on either side of your cooktop. If possible, place wall ovens with a free countertop immediately next to them so that you can set down hot food immediately. Place seasonings, breadboards and potholders in nearby drawers and cupboards. Keep serveware toward the dining area.
Other Kitchen Measurement Considerations
The dimensions of all the pieces in your kitchen are important to get right to make the best use of your space.
Refrigerator depth. A common refrigerator width is slightly less than 36 inches (92 centimeters). The problem is often the depth. In recent years some manufacturers have designed them to be much deeper than a 24-inch (61-centimeter) base cabinet. You can still buy shallower freestanding refrigerators, but you have to pay close attention to the dimensions listed in its specifications to be certain. The other option is built-in configurations, but they are significantly more expensive.
Look for a depth of 30 inches (76 centimeters) or less, excluding handles, unless you can design your kitchen space to accept a deeper unit. Another thing to consider is the swing of the refrigerator door. Always examine the swing direction to see if it will meet an obstruction.
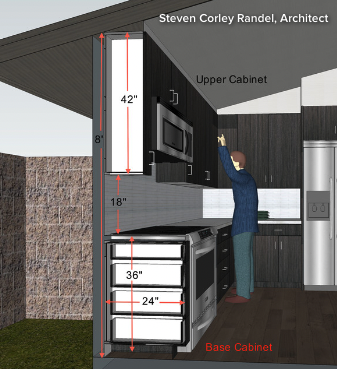
Cabinet height. Here you can see how the height of the cabinets plays an important part in the configuration. Upper cabinets are normally positioned at 18 inches (46 centimeters) above the countertop and are 30 to 42 inches (76 to 107 centimeters) in height.
Consider that your average maximum reach over and into an upper cabinet is 70 to 80 inches (178 to 203 centimeters) above the floor. Cabinets set at above 7 feet will likely need to be accessed with a step ladder. Cabinets above 8 feet are not practical for the majority of people; however, they may serve as storage for seasonal or decorative items, to be reached with step stools and ladders.
The standard dimensions for base cabinets are 24 inches (61 centimeters) deep and 36 inches (92 centimeters) high. In general people are getting taller, so some homeowners are bumping up the counter height to 38 inches (97 centimeters).
Distance between cabinets. Another important dimension to consider is the distance between cabinets. Entry points can be as little as 36 inches (92 centimeters) when there is a cabinet on only one side. Stay at least 42 inches (107 centimeters) from the face of a cabinet to the one on the other side; 48 inches (122 centimeters) is even better, but going beyond 60 inches (152 centimeters) is too wide in most cases. However, if it is a U-shaped kitchen, you could get away with up to 96 inches (244 centimeters).
Kitchen Layout Ideas
This cutaway plan illustrates arrangements and dimensions for a modest-size kitchen. Note that the preparation area is split between the island with the sink and the corner of the kitchen. The work triangle is compact. There will always be a few tradeoffs in any space.

Before the mid-’90s and 2000s, Italy had a leading position in granite processing, but things opened up after that. “In the early 2000s,” Schwartzkopf says, “you started to have a number of different countries enter.” More were both quarrying granite (getting it out of the ground) and processing it into worked granite (refining it to be cut). The United States has granite, but other countries could provide more at a lower price. That led to more countertops, creating a cycle in which supply and demand surged.
For the most part, American imports of finished granite are dominated by Brazil, China, and India, with Brazil providing about half of the worked granite supply. That means your granite probably came from an international market and likely landed somewhere in Brazil or China along the way.
Just what kind of scale are we talking about? It’s massive. Based on estimates from the US International Trade Commission, total United States imports of processed granite were about 206,000 metric tons in 1996. In 2014, they exceeded 2 million metric tons.
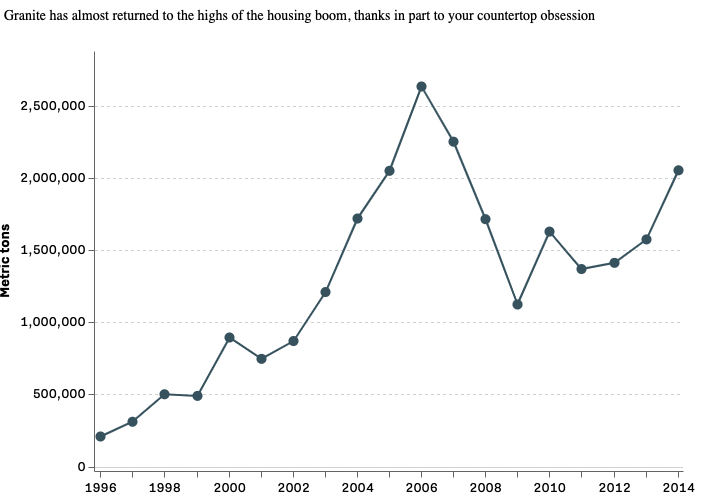
In the past, people typically got their domestic granite from local suppliers, and that kept them roughly in sync with local costs. As global granite became more easily shippable, it became more affordable for builders and consumers.
Containerized shipping is not the newest thing on the block but its rise had an influence in lowering granite prices.
Because granite slabs intended for countertops could be precut on site and then safely packed and shipped, which was largely new to the ’90s, it became possible for people to get granite from around the world.
When a granite slab arrives at a shop, it gets cut into the appropriate rough size and is then hand-shaved by someone operating an industrial grinder. But today, computer controlled saws can make major cuts, like the hole for where your sink goes, more easily.
While granite used to be impractical and niche, computer cutting has made it much easier to work with.
The timing of the granite boom is closely tied to that of the housing bubble of the 2000s. That’s probably not a coincidence. Trends in home construction during that period probably helped change public opinion on what a “good” countertop looked like.
As builders put granite into their homes, it quickly became a standard. In turn, even older houses needing renovation latched onto that granite mania. One trend — a boom in home construction — took granite along for the ride and perpetuated the impression that granite was the prime material of a “new” building.
Granite went from being a premium option to a sales come-on.
Post-bust, granite fell, but it’s picked up again without the housing boom’s artificial highs.
Admittedly, there are some benefits to granite as a material. New varieties have given it more color and range since the ’80s, and it has some advantages over competitive materials like marble, which is likely to etch or stain. But a big part of its appeal is an impression of luxury that, thanks to changing globalization, technology, and housing trends, makes it an affordable indulgence for the middle class.
A lot of people like granite well enough. But for anyone who’s spent too much time watching HGTV, it’s hard not to wonder if our nation’s brightest minds will ever break free from their granite addiction.
Marble is rallying as white becomes a big color again, and there’s a strong trend in recycled surfaces that allow for both flash and environmental consciousness.
Still, for the most part, there’s little reason to believe that the granite fervor will disappear. The big trends that helped it become a hit continue to make it a realistic luxury option for the middle class. So be prepared — you’ll probably be seeing people screaming, “Oh my god, granite countertops!” for a while, even as quartz gains ground.
The global engineered quartz surface market size was USD 17.10 billion in 2019. The regional impact of COVID-19 has been unprecedented and staggering, with engineered quartz countertops witnessing a positive demand across the region amid the pandemic. Based on our analysis, the market exhibited a modest growth of 8.1 % in 2020. The market is projected to grow from USD 18.50 billion in 2020 to USD 33.50 billion in 2027 at a CAGR of 8.9% in the 2020-2027 period. The sudden fall in CAGR is attributable to this market’s demand and growth returning to pre-pandemic levels once the pandemic is over.
Engineered quartz is a highly-preferred engineered stone for constructing a wide range of cabinetry solutions, as it is capable of levering more pressure. Compared to other materials, engineered quartz surfaces have higher durability and weight-bearing capacity, thus ensuring their reliability among customers and manufacturers. The application of aesthetic construction materials is increasing across the construction and fabrication industry throughout the world. Delivering beautiful aesthetic quartz surfaces is becoming a key factor for manufacturers across Asia Pacific, the Middle East, and European countries, owing to cultural ethics and norms, thereby expanding the regional customer base.
Key manufacturers are pioneering technological developments in order to gain a competitive advantage for sustained success. Artificial intelligence (All. and machine learning (ML) technologies have revolutionized the quartz manufacturing sector, enabling the use of automated sorting methods. Al and ML identify the characteristics and defects in tiles using a laser sensor and IP camera, thus improving the sorting method for the quartz countertop materials.
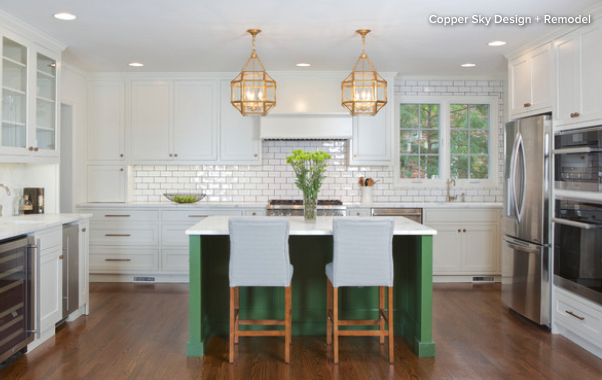
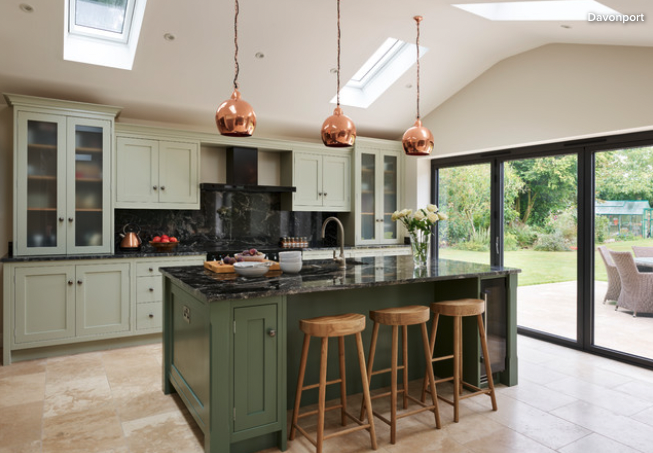
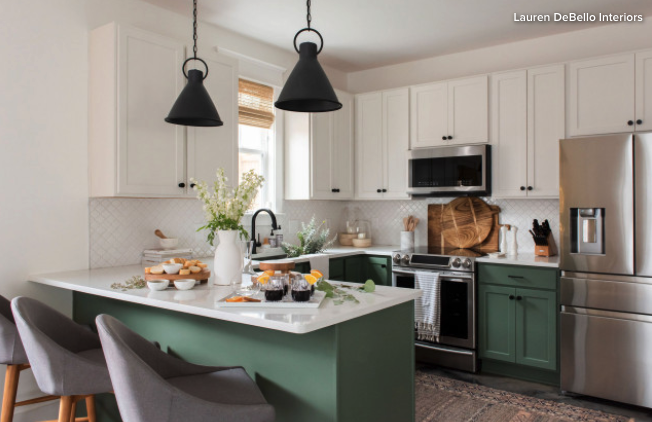
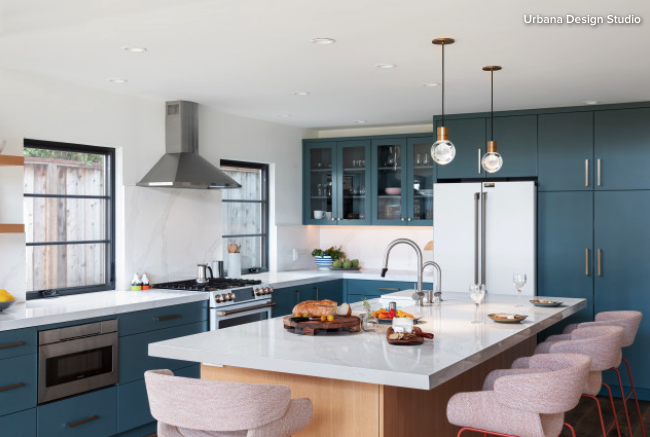
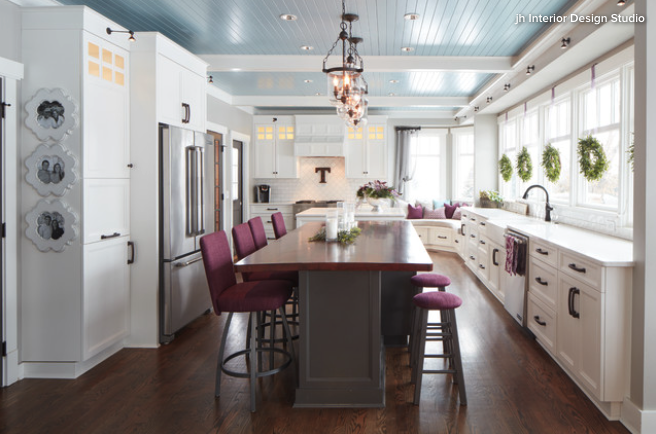
Whether soft and sage-y or loud and lime-like, green is a natural choice for an island accent
Green is a popular color for kitchens because we associate it with freshness — in vegetables, fruits, herbs and more. But just as there are many different green-colored ingredients to cook with and eat, there are many shades of green paint to choose from when considering an island accent.
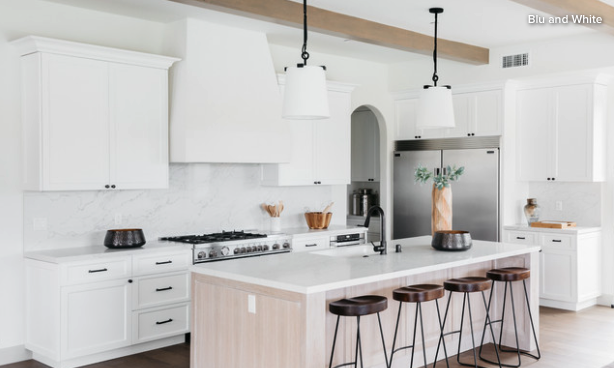
Monochromatic white kitchens have been extremely popular over the last few years, but one of the challenges of decorating in a single color is that you need to use elements other than color — such as texture, sheen and pattern — to visually break up the space and make it interesting.
That’s fine in most rooms, but in a kitchen you need to consider durability and how easy the surfaces are to maintain. This limits the materials you can use — a finish with a pronounced texture, for example, can be difficult to clean.
Color, then, can be your friend in the kitchen because it’s a simple way to add some zing. And an accent paint color on the island is relatively easy to change out later if you want to.
This kitchen is mostly white, but the touches of vegetal green, most notably on the island, give the space life and, in my view, make it more visually interesting than it would be if it was clad all in white.
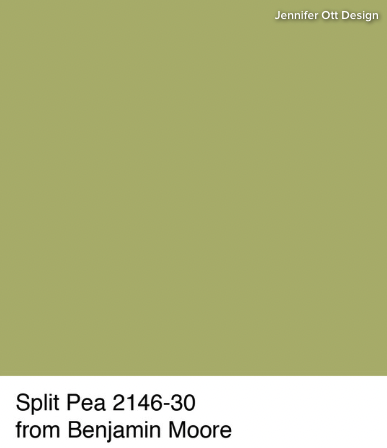
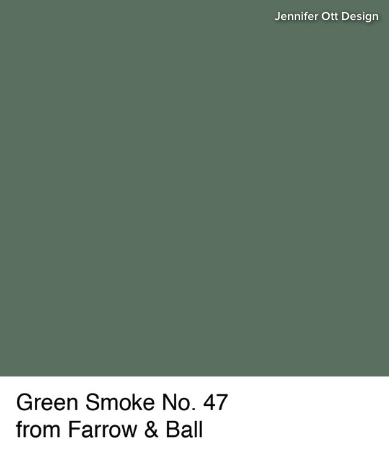
Tip: The island featured above is painted in Benjamin Moore’s Split Pea. When I look at a paint swatch of Split Pea, however, it looks quite different from the color I see on the island on my computer monitor. This is why it’s crucial that you always sample actual paint colors rather than selecting them based solely on a photo viewed online. Your architect or designer can guide you toward the right color choice for your project.
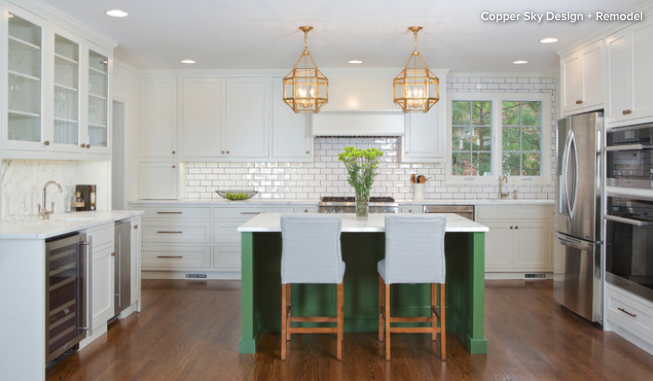
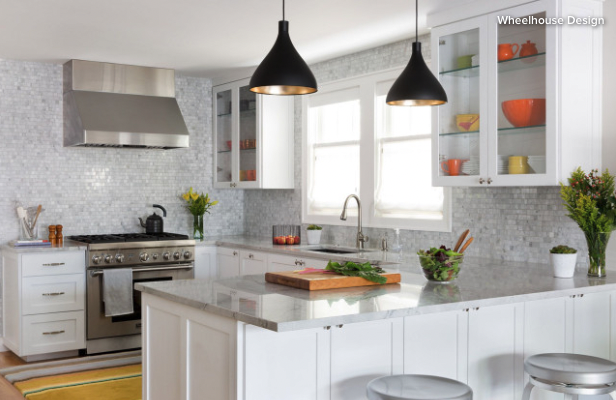
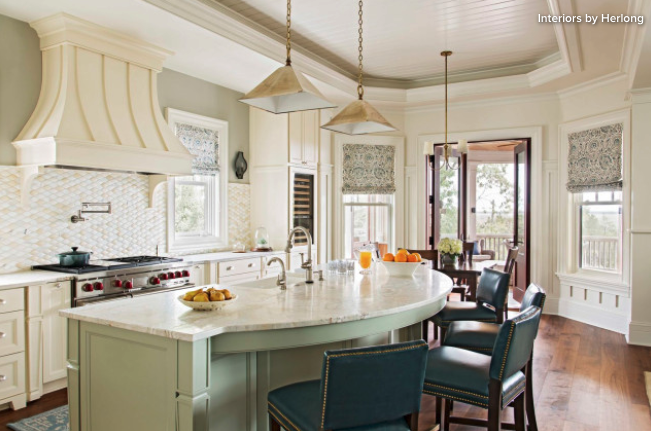
Here’s another mostly white kitchen that features a beautiful herbaceous green island as the focal point. It’s a fairly bold color, but because it’s partnered with a lot of white, it looks crisp without being too visually busy.
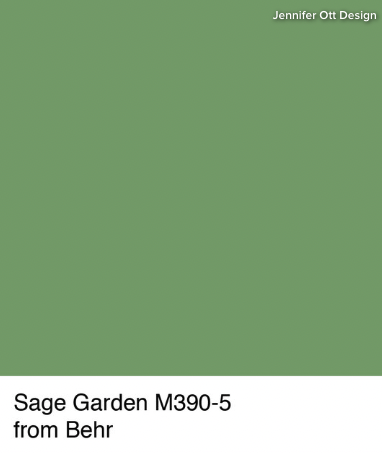
A similar color to try is Sage Garden from Behr. This particular color works nicely, as demonstrated above, when paired with warm elements such as hardwood floors and gold- or bronze-tone metallic finishes.
Tip: In a mostly monochromatic space, anything painted in a different color is going to stand out. That’s why it’s important to make sure the item is worthy of the attention. In this case, the island is truly the hub of the kitchen and is therefore the right focal element.
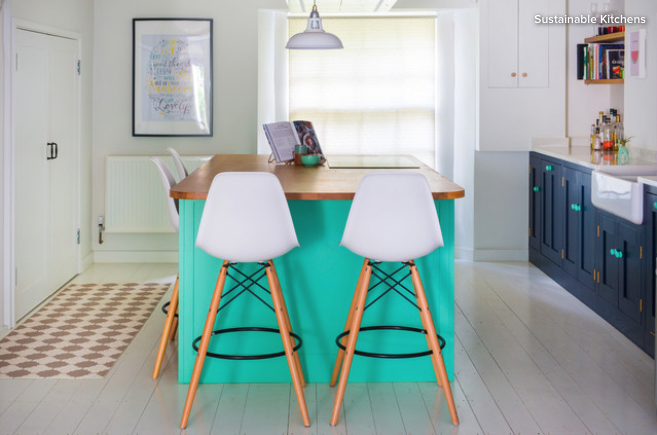
This color admittedly isn’t for everyone. It’s about as bold as you can go with green. But I give it a huge thumbs-up because it’s unusual and also used in a smart way. Because this is a clean and fairly minimalist space with no other bold colors or elements, the green is striking rather than garish.
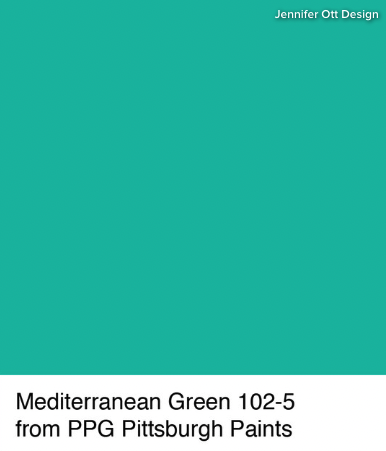
I strongly recommend working with one of our design professional who specializes in color if you want to go this bold. A pro can help determine if and how you can make a saturated color such as Mediterranean Green in your kitchen.
Tip: When selecting paint, there’s more to consider than color alone. Sheen is very important, especially on an island, which sees lots of wear and tear. A higher-gloss paint is going to be more durable and easier to clean, but the downside is that it more easily shows surface imperfections.
If the previous color example was a firm “nope” for you, then perhaps a soft silvery green like this is more palatable.
The key to picking a winning shade in this family is to find a color that has plenty of gray in it, which helps it steer clear of looking too sweetly pastel.
Tip: This kitchen is blessed with plenty of natural light, but if yours isn’t, you may want to keep the kitchen colors light. This whisper-soft green adds a little kick of color but the palette stays super soft and airy.
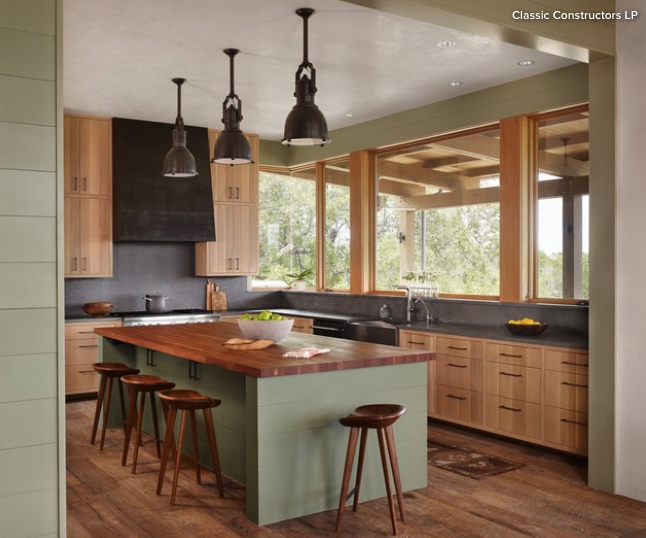
Here’s another subtle and soothing green, this one a bit warmer than the last option.
I would argue that this color can be used as a neutral, in that you can pair it with almost any other color. Benjamin Moore’s Levingston Green is a comparable choice that’s a nice alternative to white or off-white in a space.
Tip: If you live in a cold climate, think about bringing in visual warmth through color. Warm wood tones, such as used in this example, go a long way toward cozying up a kitchen. This green, being of the warmer variety, adds to the soothing vibe.
Two-toned cabinet schemes are hot with homeowners right now, and this kitchen, with its elegant shades of green, is a good-looking example.
It’s a lovely, organic palette that gives a nod to the beautiful yard just steps away.
Tip: If you want a space with many different materials, colors and textures, think carefully about the color palette. This kitchen features a variety of materials, sheens and colors, but because the colors are all fairly subdued, the effect is harmonious rather than busy or clashing.
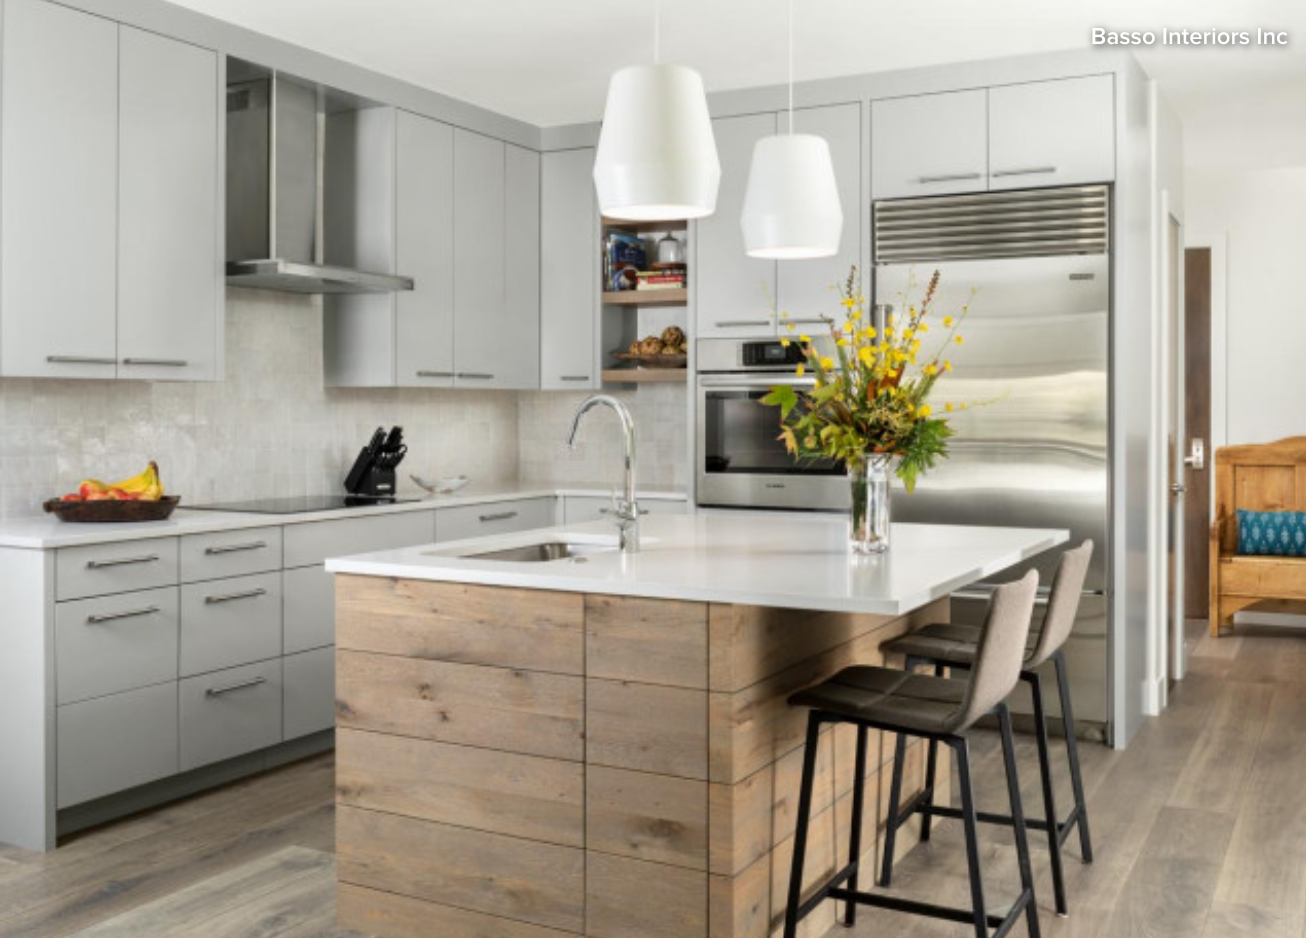
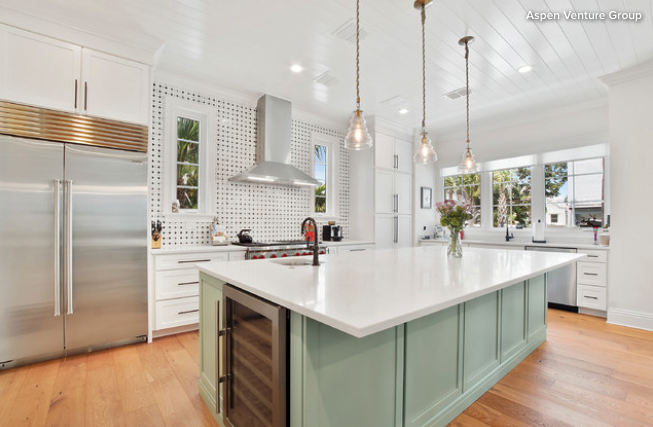
This may be the smallest island featured, but what it lacks in size it more than makes up for in style. In fact, if your island is modestly sized, you can really have fun with color on it because it will be a relatively small dose in the kitchen.
written by. Jennifer Ott
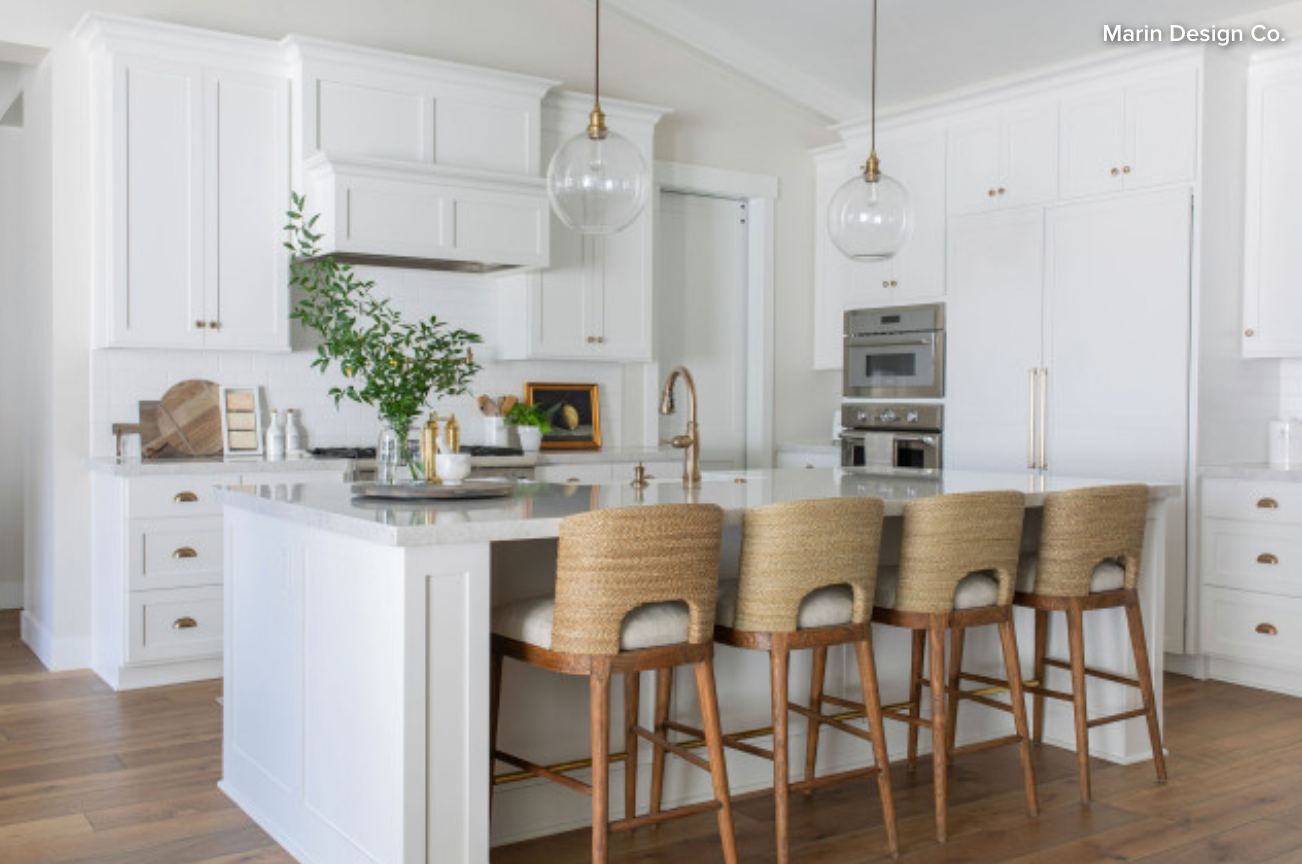
I once heard a story about a homeowner who had a major design regret. During a previous renovation, she elected to put all four counter stools on the same side of her kitchen island, a frequent spot for her family meals. This left her with a beautiful look but turned out to be an unfortunate mistake from a functional perspective. That’s because she now has to choose between having everyone in her family face in one direction like strangers in a diner and having to pull around a stool to sit on the wrong side of the island, with her knees bumping up against cabinets for the sake of family bonding.
Don’t let a good visual get in the way of functionality. Before you renovate or give your island an update, consider these options for how to choose the best dining arrangement to save your household — and your knees — a lot of bumps down the road.

You can request this color from our website inventory here
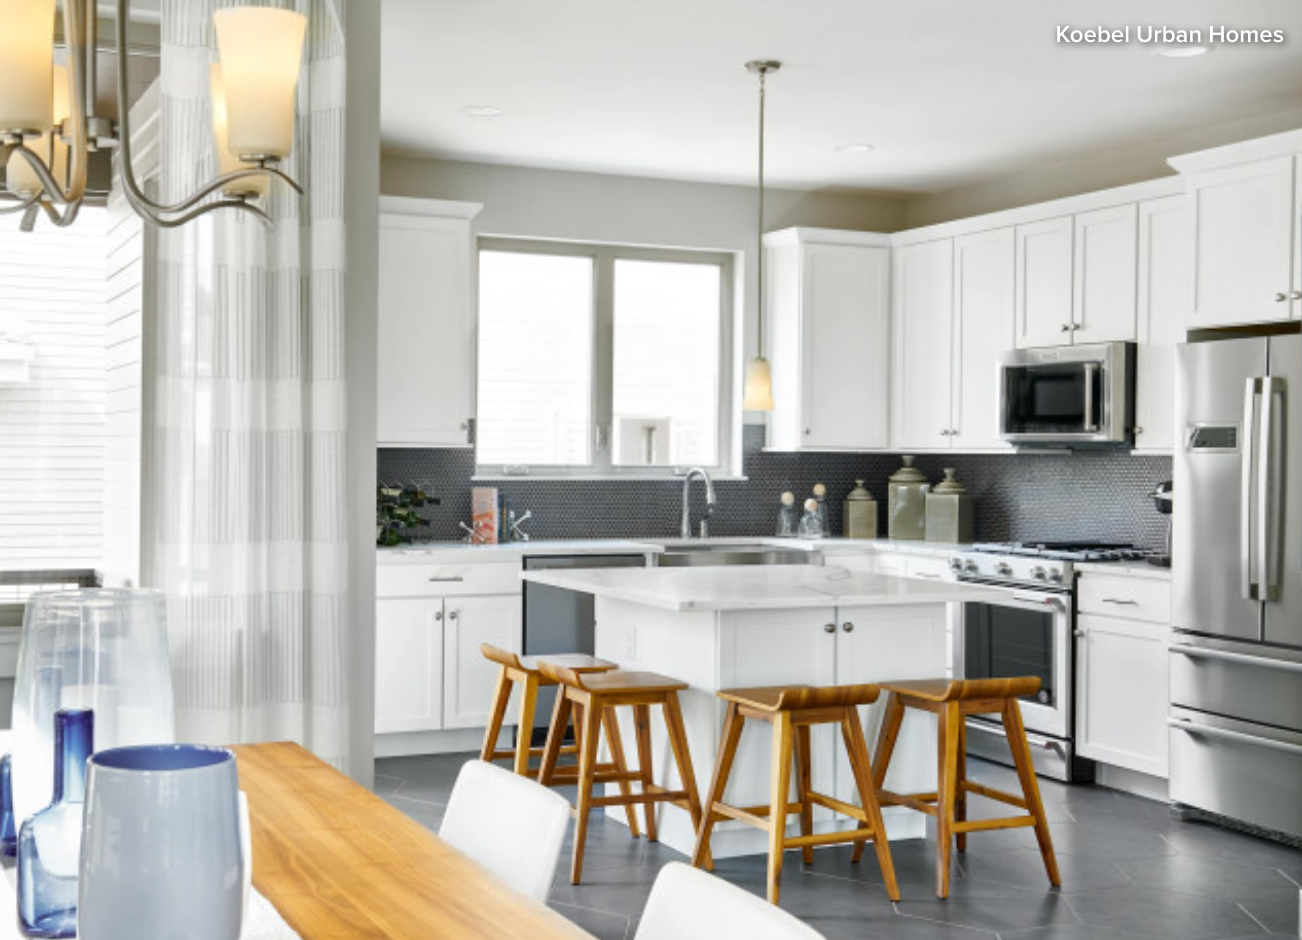
One-Side Seating
An island with seating on just one side is a common arrangement for a reason, and it can work well for some situations. However, if you’re looking to use the island as a frequent spot for family meals, it’s usually not ideal. Placing all seats on one side means everyone who is seated will be facing forward in a line, which doesn’t facilitate conversation.
This arrangement works fine when just one or a few guests will be perched, chatting with the chef, or for a small household where most meals involve just one or two people. If the island isn’t expected to be used for larger groups than that, it makes sense not to dedicate any more space to seating.
If you don’t have room or a need for seats on more than one side, go the simple one-side route — just keep in mind that some factors will affect how comfortably guests can sit.
If your island has sides or legs that the seats sit between, as shown here, they might cut into the legroom.

Choosing an island without sides will give a bit more space for legs and knees, and more flexibility to scoot the stools to the side a little so diners can face toward each other more easily.
Two-Side Seating: Adjacent Sides
Adding seats to even just one adjacent side can go a long way to making your island a much more inviting spot to dine. By extending the island overhang to two sides instead of just one, you allow guests to sit facing each other.
You can keep seats on both sides at all times, or save space by keeping seats on just one side most of the time and pulling a seat over to the available shorter side when needed.
This can be a great compromise where the floor plan doesn’t leave a lot of room for seating. By extending the overhang a few inches on the short side, you allow it to be used as a dining spot in a pinch, without losing too much storage or circulation space.
If you use a rounded corner like this one, you can effectively get three directions of seats from just two sides of the island, for a dining experience that’s even closer to sitting at a regular table.
Two-Side Seating: Opposite Sides
If your kitchen is long and skinny, it may make more sense to have a long, thin island, with seating on two opposite sides. This means guests can face each other, although if the island is quite narrow, you may not have much room to fit place settings as well as serving dishes.
If you don’t mind the more eclectic look, mixing bar stools that have backs with backless bar stools will give you the best of both worlds, with comfier seats for everyday use and more compact seats to pull out for bigger get-togethers.
Compared with having a stand-alone table away from the island, this takes up less floor area because you don’t have circulation space between the island and table. Of course, the trade-off is the table has only three useable sides.
In an average-size kitchen, the decision often comes down to whether you want a more casual or more formal experience. For casual dining, this is a great solution that keeps the chef in on the action.
Seating With Arms
If you have a narrow island, seats with arms will provide a more comfortable dining experience. At the same time, arms generally take up more space and often won’t tuck under as easily. If you hope to use stools with arms, plan for each guest to have 28 to 32 inches of width instead.
Carefully consider whether you have the space for roomy stools with arms. If you do, consider it an investment in many comfortable meals at your wonderful dining island.
written by Yanic Simard

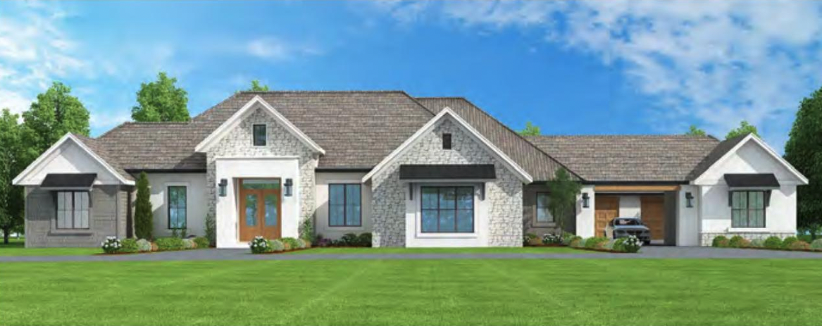
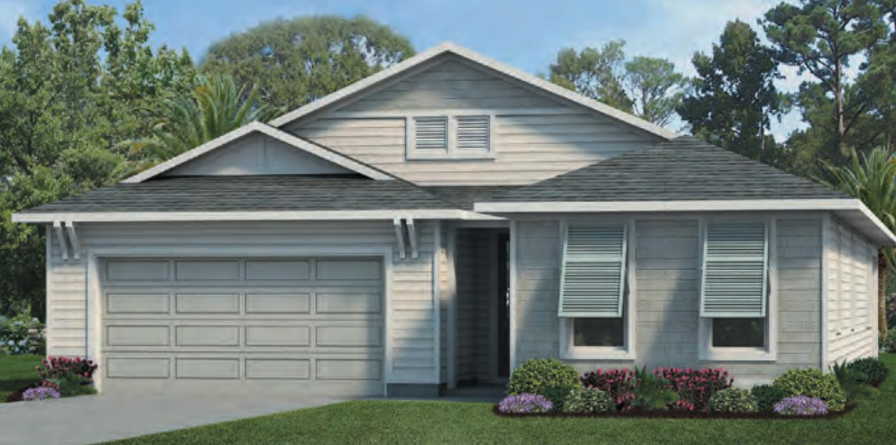
This home will be featured in the Flink Rock Agrihood, a luxury residential neighborhood incorporating Country Estate architecture with three gated subdivisions.
Location: 5918 SW 124th Way, Archer

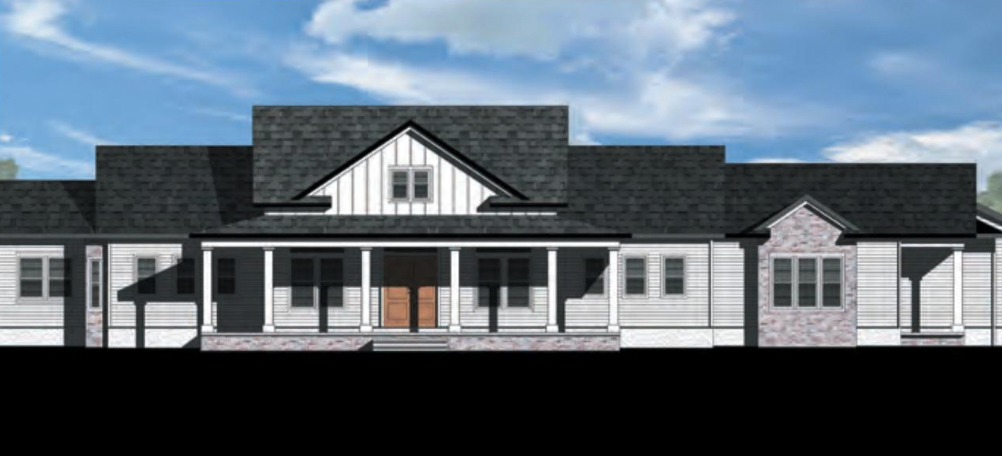
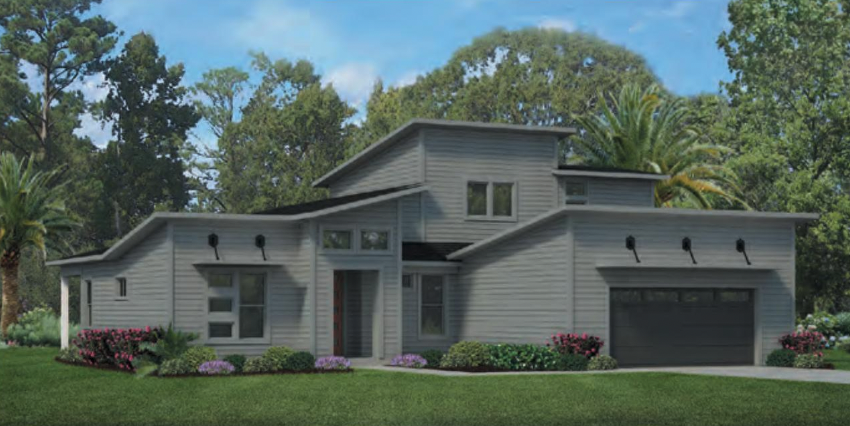
Location: 5946 SW 124th Way, Archer

Location: 12563 SW 58th Circle, Archer
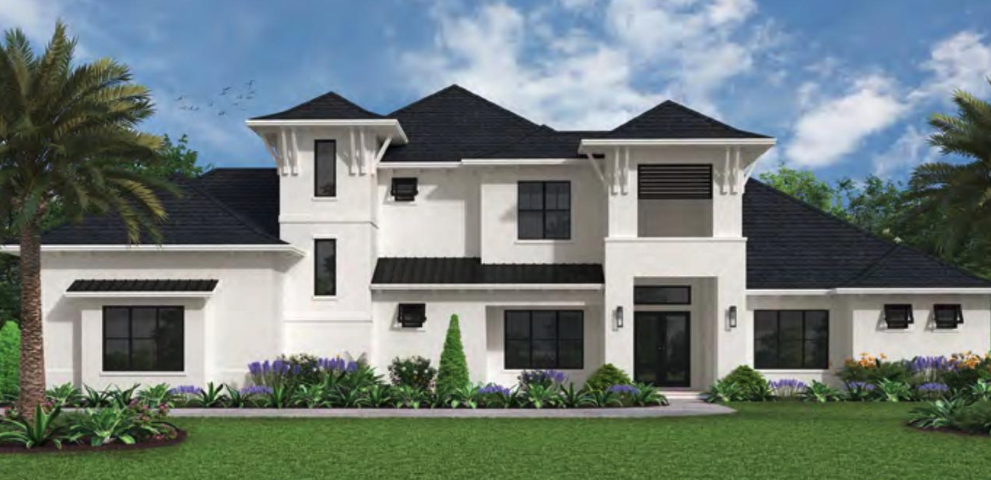
BANCF Parade of Homes #4 : BARRY RUTENBERG & ASSOCIATES, INC.
Location: 2219 NW 150th Blvd, Newberry
Location: 506 SW 144th Drive, Gainesville

Location: 524 SW 144th Drive, Gainesville
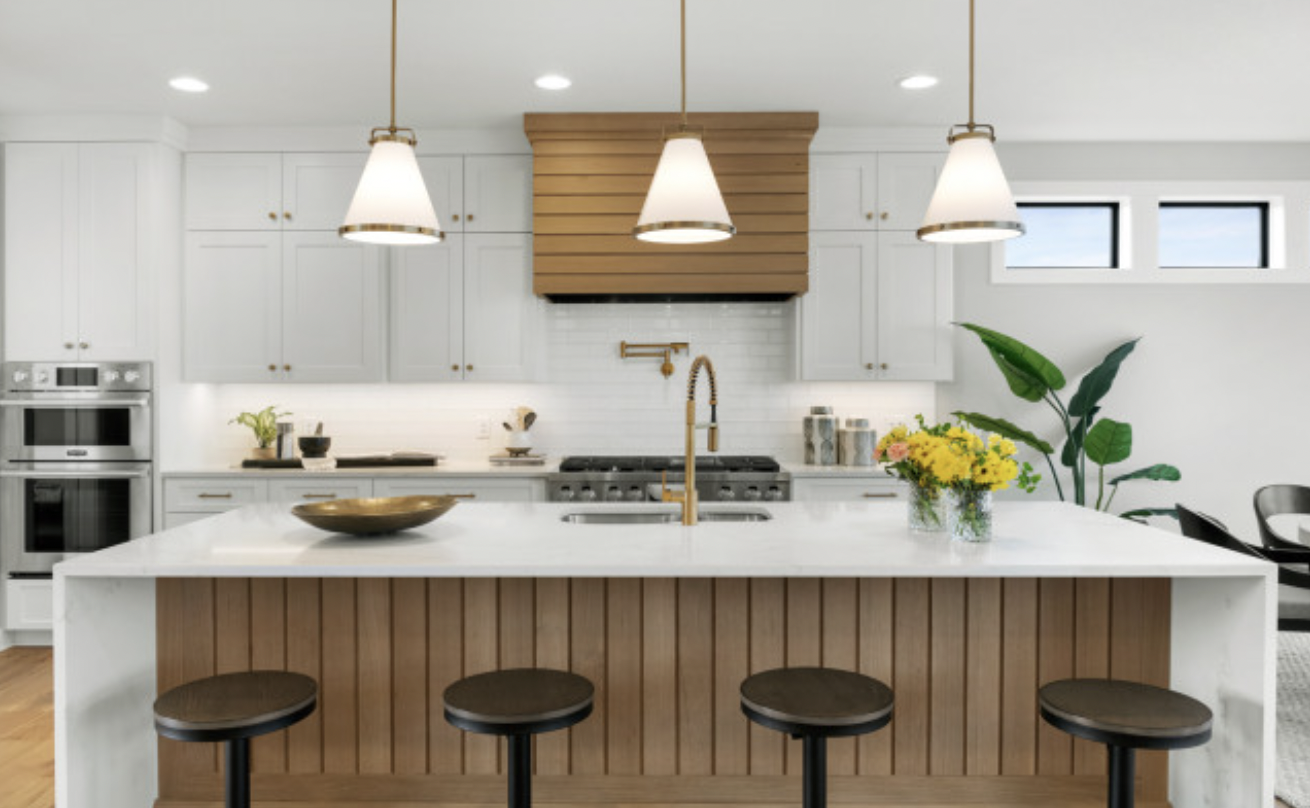
Whether you’re planning a kitchen remodel with the help of Jackson Stoneworks or with our online Kitchen Visualizer, knowing which style resonates with you can be a big help. Read on for the need-to-know details about 10 popular kitchen styles, including color palettes and key features of each look.
Transitional
Transitional kitchens gracefully walk the line between traditional and contemporary, with just enough detailing to please folks in both design camps. Keep in mind that while there are elements of both traditional and contemporary styles present, transitional kitchens don’t veer too far in either direction.
Key features of transitional-style kitchens:
Color palette: In transitional kitchens, serene neutrals are key. Whether you opt for cool or warm hues, the colors tend to be soft and subtle. For a richer look, consider deep blue or gray cabinetry.
Traditional
Traditional kitchens are comfortably refined, with luxurious finishes, intricate architectural elements and classic details. Unlike modern and contemporary-style spaces, traditional kitchens welcome a bit of ornate millwork and well-curated collections.
Key features of traditional-style kitchens:
Color palette: Traditional kitchens favor rich colors that have stood the test of time. White is a popular choice for cabinetry, but it’s not the only option. If you’re looking for something different, consider soft shades of blue, green, beige or natural wood.
Contemporary
Contemporary kitchens fully embrace the latest in technology, materials and trends for an of-the-moment look with clean lines and minimal adornment.
Key features of contemporary-style kitchens:
Color palette: White is a popular choice for contemporary kitchens, but it’s certainly not the only option. Color can be bright and bold or soft and subtle. Consider using crisp white walls as a jumping-off point for colorful cabinetry or an eye-catching backsplash.
Modern
Modern kitchens emphasize form and structure rather than surface ornamentation — think of smooth surfaces like concrete and steel, strong horizontal lines and plenty of open space. The polar opposite of traditional style, modern kitchens embrace a minimalist aesthetic that keeps the emphasis on the architecture.
Key features of modern-style kitchens:
Color palette: The focus of a modern kitchen is on the architecture, which means the color palette tends toward crisp and clean white, subtle neutrals and black. When brighter colors do appear, it’s often in the form of accessories.
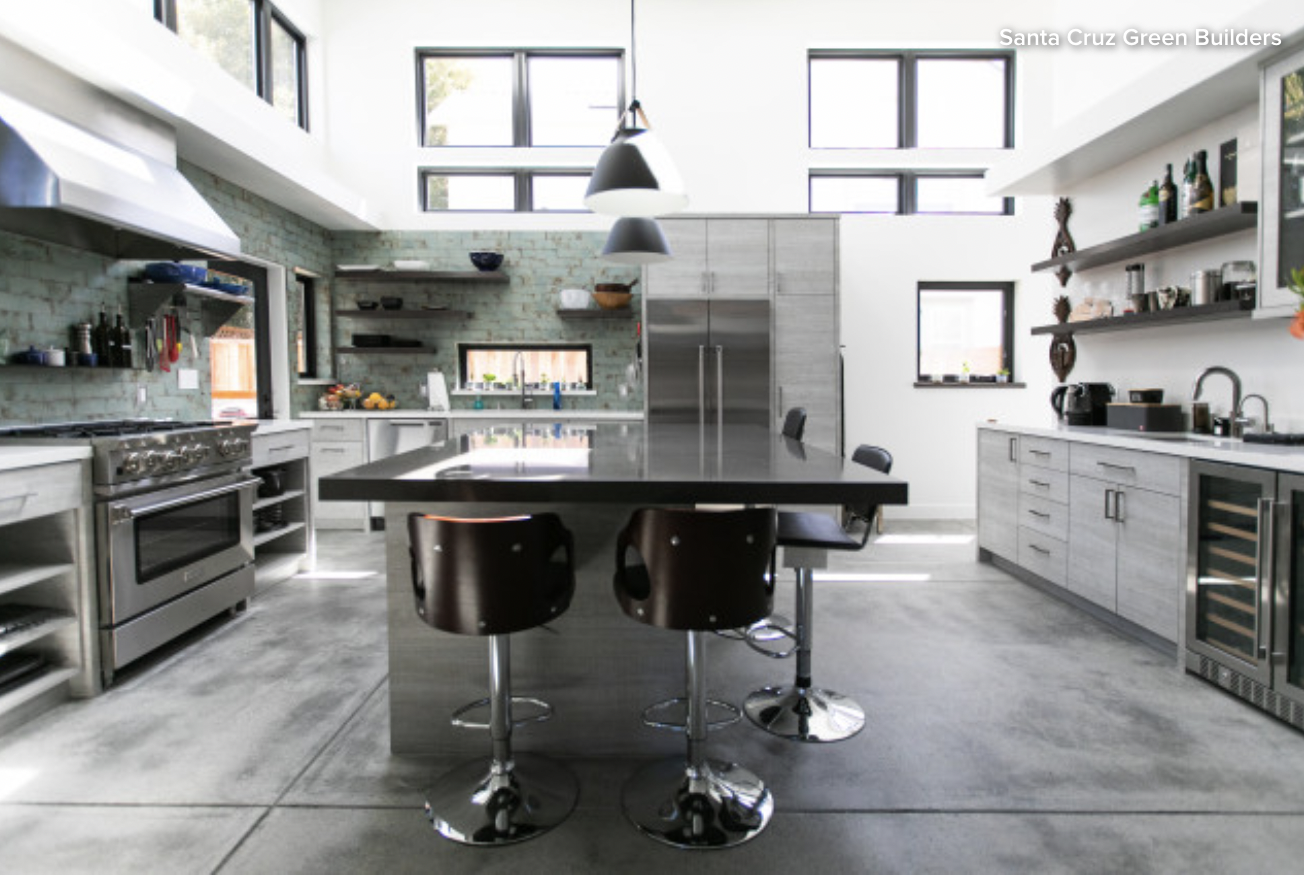
Industrial
Reminiscent of factories and warehouses, industrial-style kitchens are simple, utilitarian spaces where raw materials and tough fixtures and finishes take center stage. Favoring practical, hard-wearing surfaces and restaurant-grade equipment over ornament and excess embellishment, industrial-style kitchens are made to stand up to a lot of use.
Key features of industrial-style kitchens:
Color palette: The raw materials used form the foundation of the color palette in an industrial-style kitchen. Think of concrete gray, architectural white and matte black, with an occasional pop of saturated color.
Beach
Beach kitchens are light, bright and open, with ample island space and a casual, easygoing style perfect for socializing with family and friends. Beach kitchens can lean contemporary, traditional or somewhere in between — the relaxed mood is more important than the specifics.
Key features of beach-style kitchens:
Color palette: Beach-style kitchens gather inspiration from the colors of sand, sea and sky. White is a popular choice for walls and cabinetry, as it creates a crisp backdrop for pops of sea-inspired color. For a more vibrant take, look to greens and bold corals to add tropical flair.
Craftsman
Craftsman-style kitchens spotlight the simple beauty of natural wood and quality workmanship within a warm, cozy atmosphere. Craftsman kitchens are not the place to experiment with trends or veer too far from the plucked-from-nature aesthetic.
Key features of Craftsman-style kitchens:
Color palette: Craftsman-style kitchens feature rich earth tones, vibrant greens and warm neutrals that coordinate well with natural wood.
Tell us: Which kitchen style is your favorite? Share in the Comments.